This page applies to AD Bulk Users, AD Bulk Export and AD Reporting, AD Phonebook users click follow the steps on this page here.
The following steps show how to obtain a Client ID from Azure for use with AD Bulk Users, AD Bulk Export and AD Reporting.
AD Bulk Export is amazingly simple to use yet a powerful application that allows you to export data from Active Directory to various formats including CSV, Excel (xls), PDF and SQL and Oracle databases. You can export data for Users, Contacts, Groups and Computer objects, with advanced filtering you can export just the data you need and with the built-in scheduler you can export this data when you need it to the destination you need (CSV, Excel, SQL, Oracle etc).
Please note when connecting to Azure AD you may need to run the program with elevated permissions i.e. Run As Administrator, this is due to the Azure connection being cached in a file that is created within the program folder.
AD Bulk Export enables you to export all available attributes including any custom attributes you’ve added plus attributes from programs that have extended the schema such as Microsoft Exchange, Lync etc. AD Bulk Export is ideal for Active Directory migrations when used with AD Bulk Users and AD Bulk Contacts.
The steps below show how to create an Azure AD Enterprise Application, assign the necessary permissions and to obtain the Client ID for use in the program.
The first thing you have got to do is login to Azure Portal. Microsoft Azure is a cloud computing service made by Microsoft for testing, deploying and managing services and applications through Microsoft-managed data centers. It supports many different programming languages, tools and frameworks, including both Microsoft-specific and third-party software and systems.
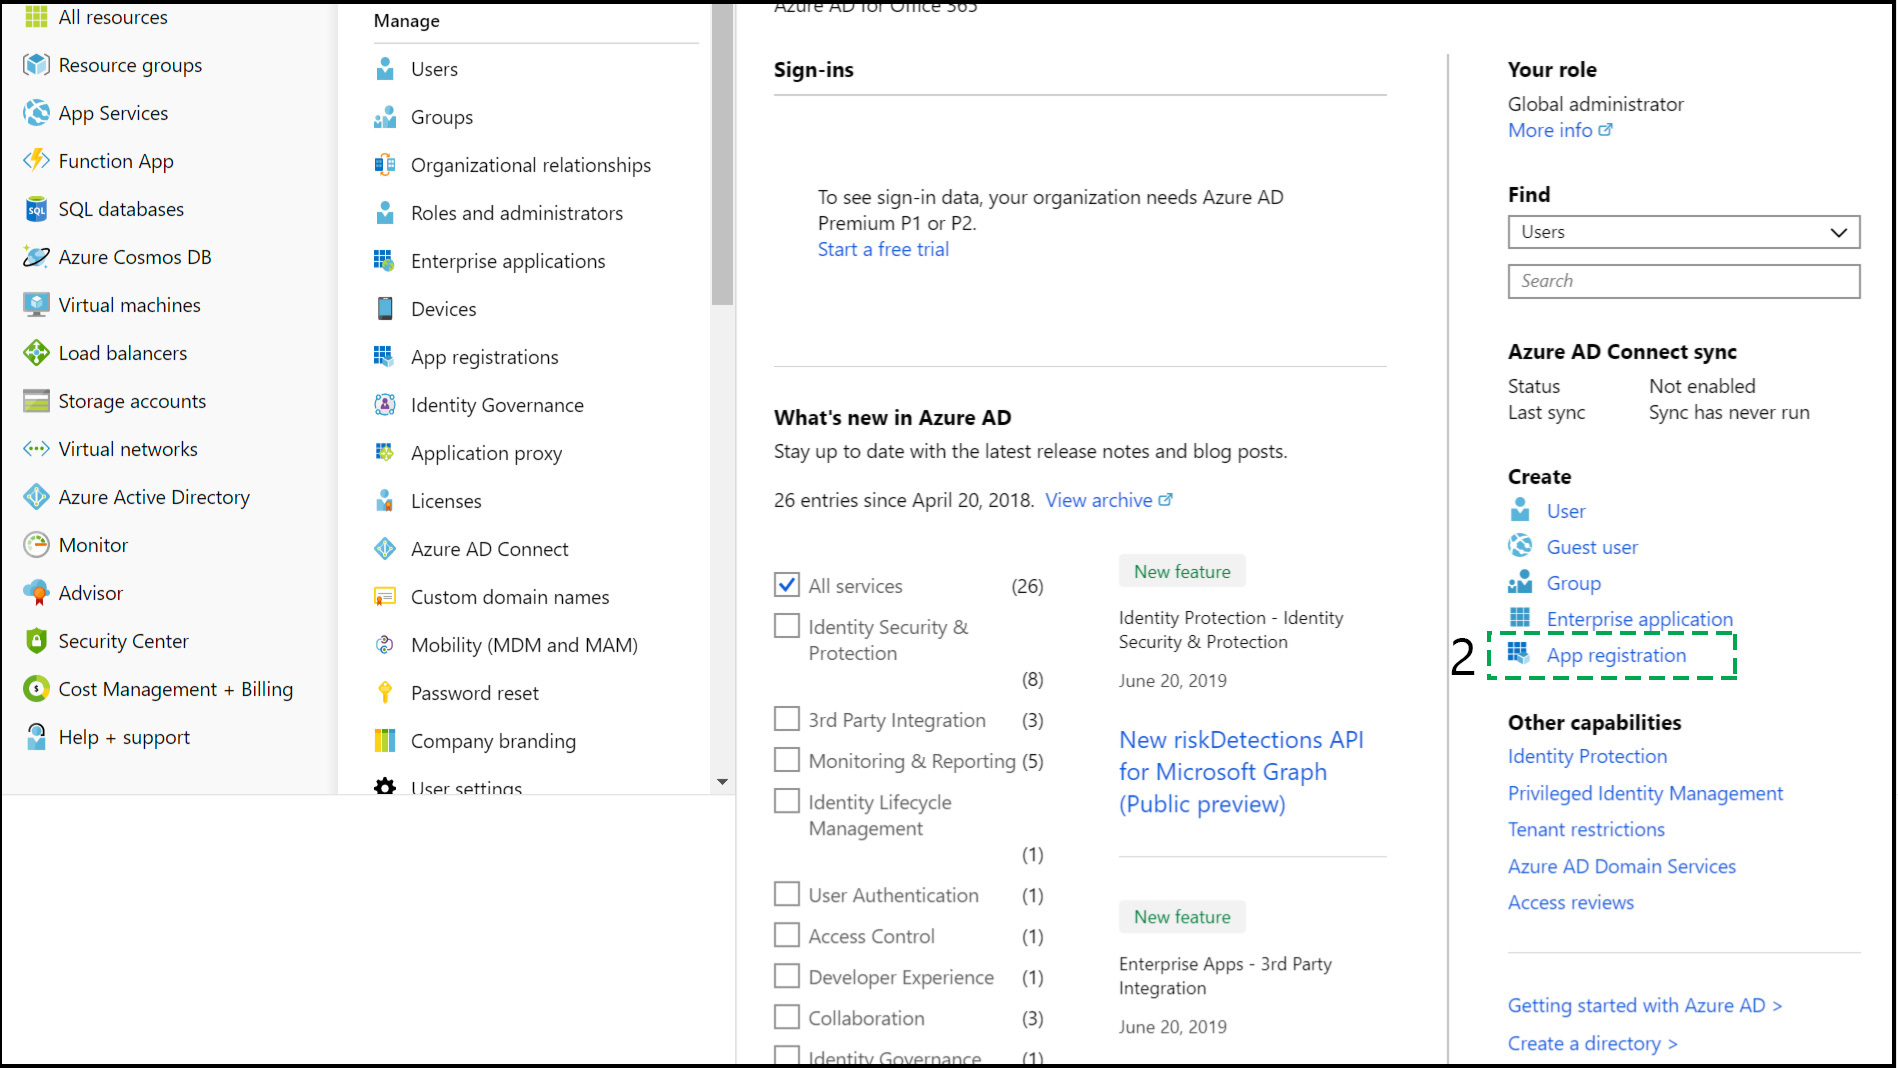
After you managed to login the application, the next thing to do is head over to the Azure Active Directory (1) from the left side menu bar.

Than, click on the App Registration link (2).
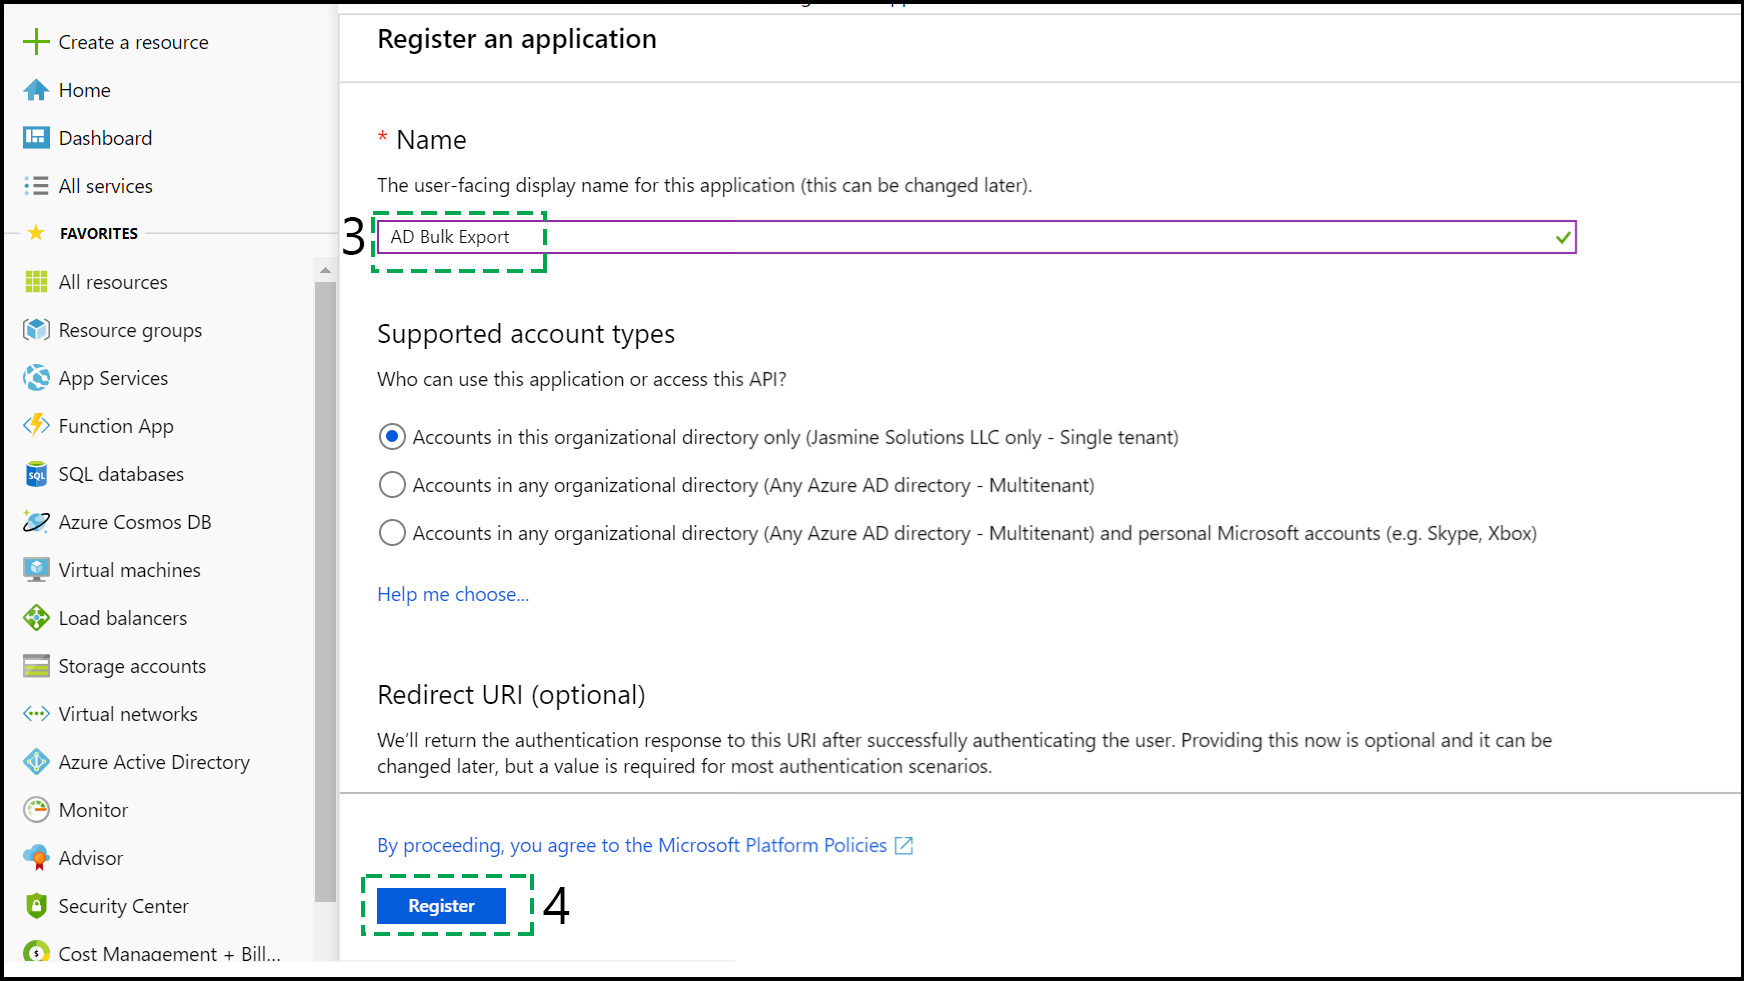
From the App Registrations menu, you will need to look out for Register an application option. Enter AD Bulk Export as the name of the application. (3)
After imputing a name and checking the Single Tenant box, all you have got to do is press the Register button. (4)
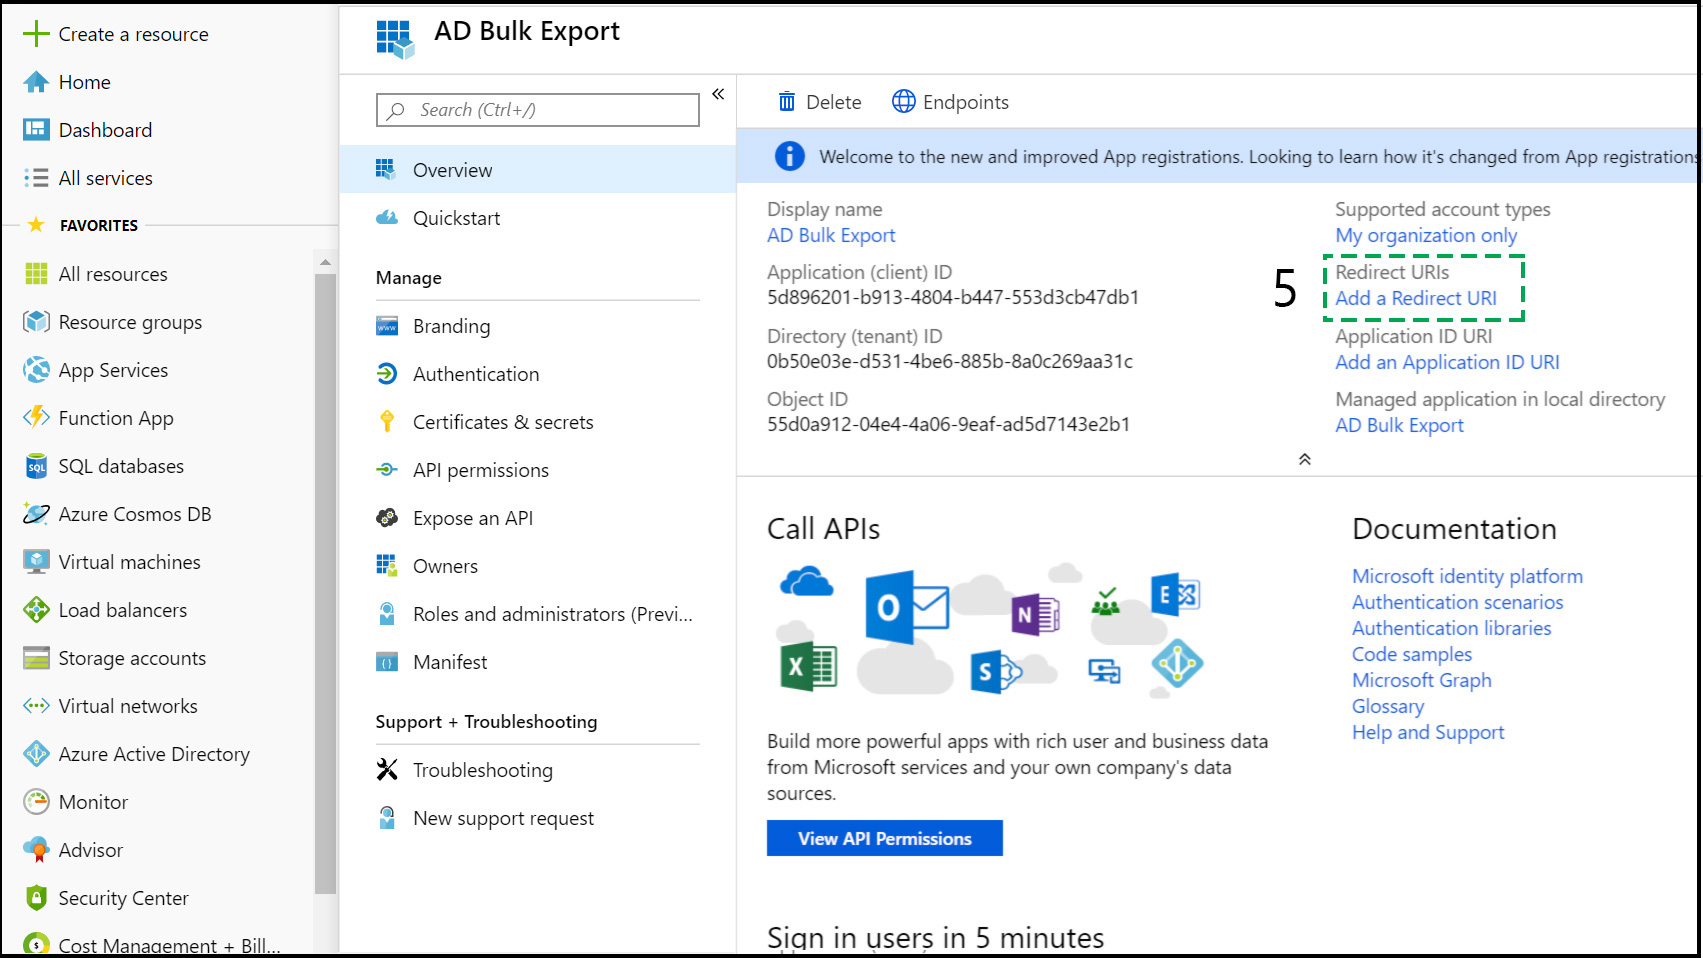
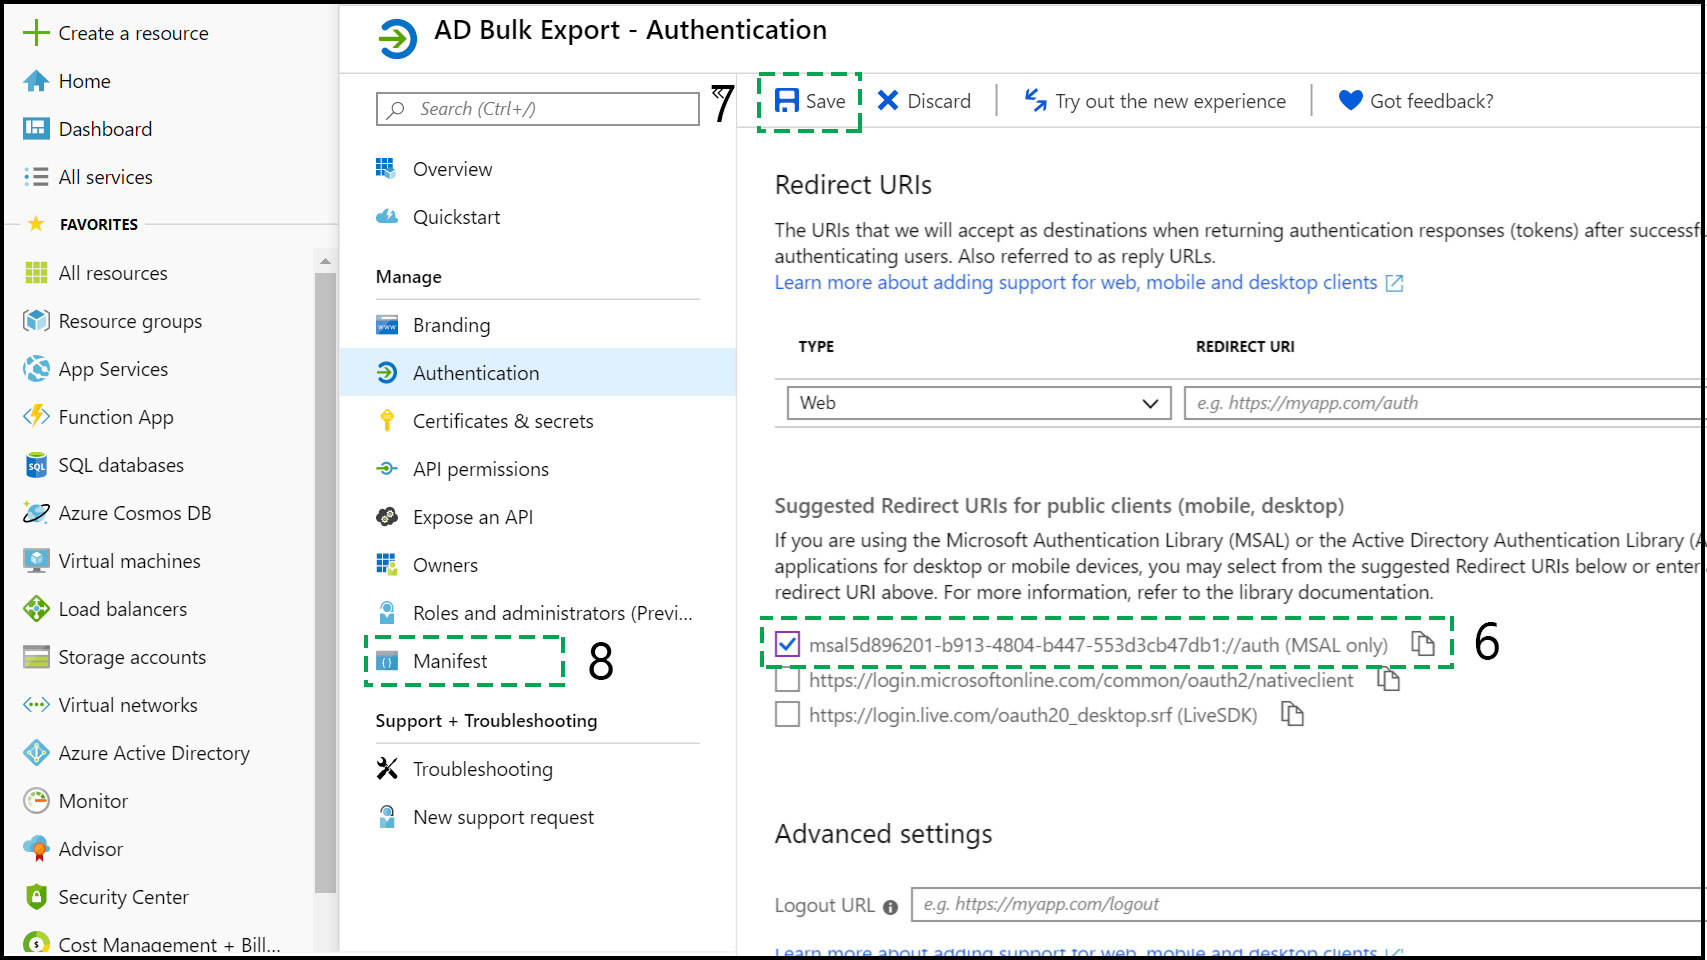
Select AD Bulk Export, and on the right side of the page you will see a button called Add a redirect URI. (5)
This will lead you to the Authentication procedure where you will have to check first box (MSAL only) of the three options available for you. (6)
Save the option by clicking the top Save link. (7)
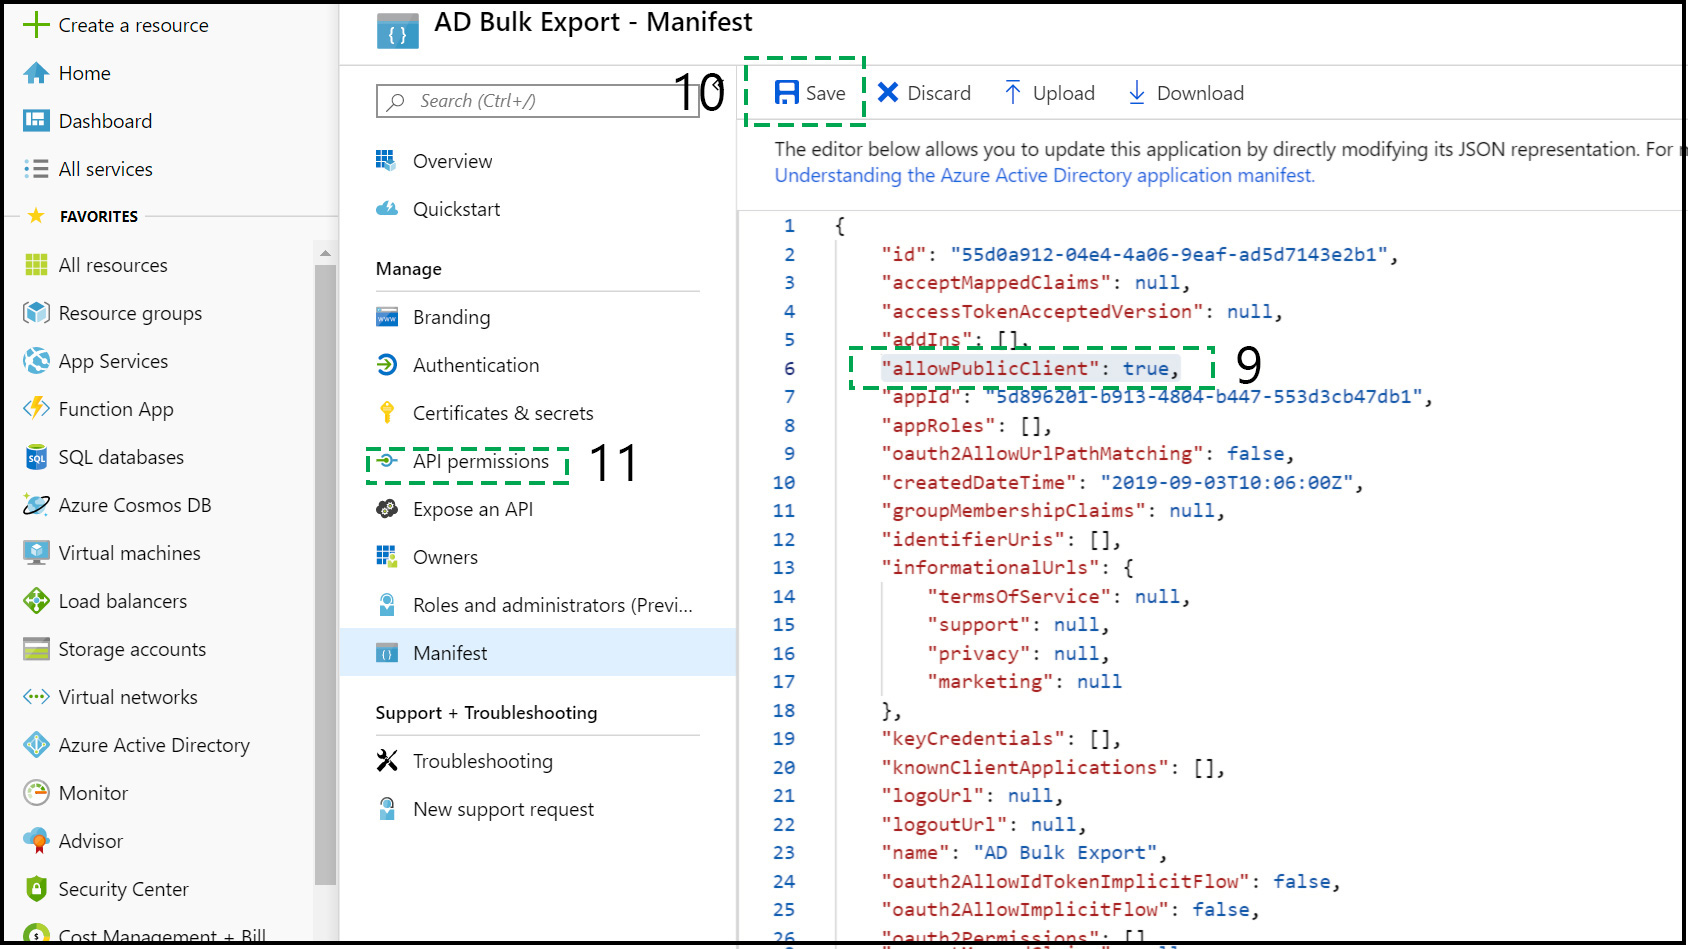
On the left side of the Manage settings, click on the Manifest option. (8)
Here, we’ll set the allowPublicClient property value to true (9) and save the changes. (10)
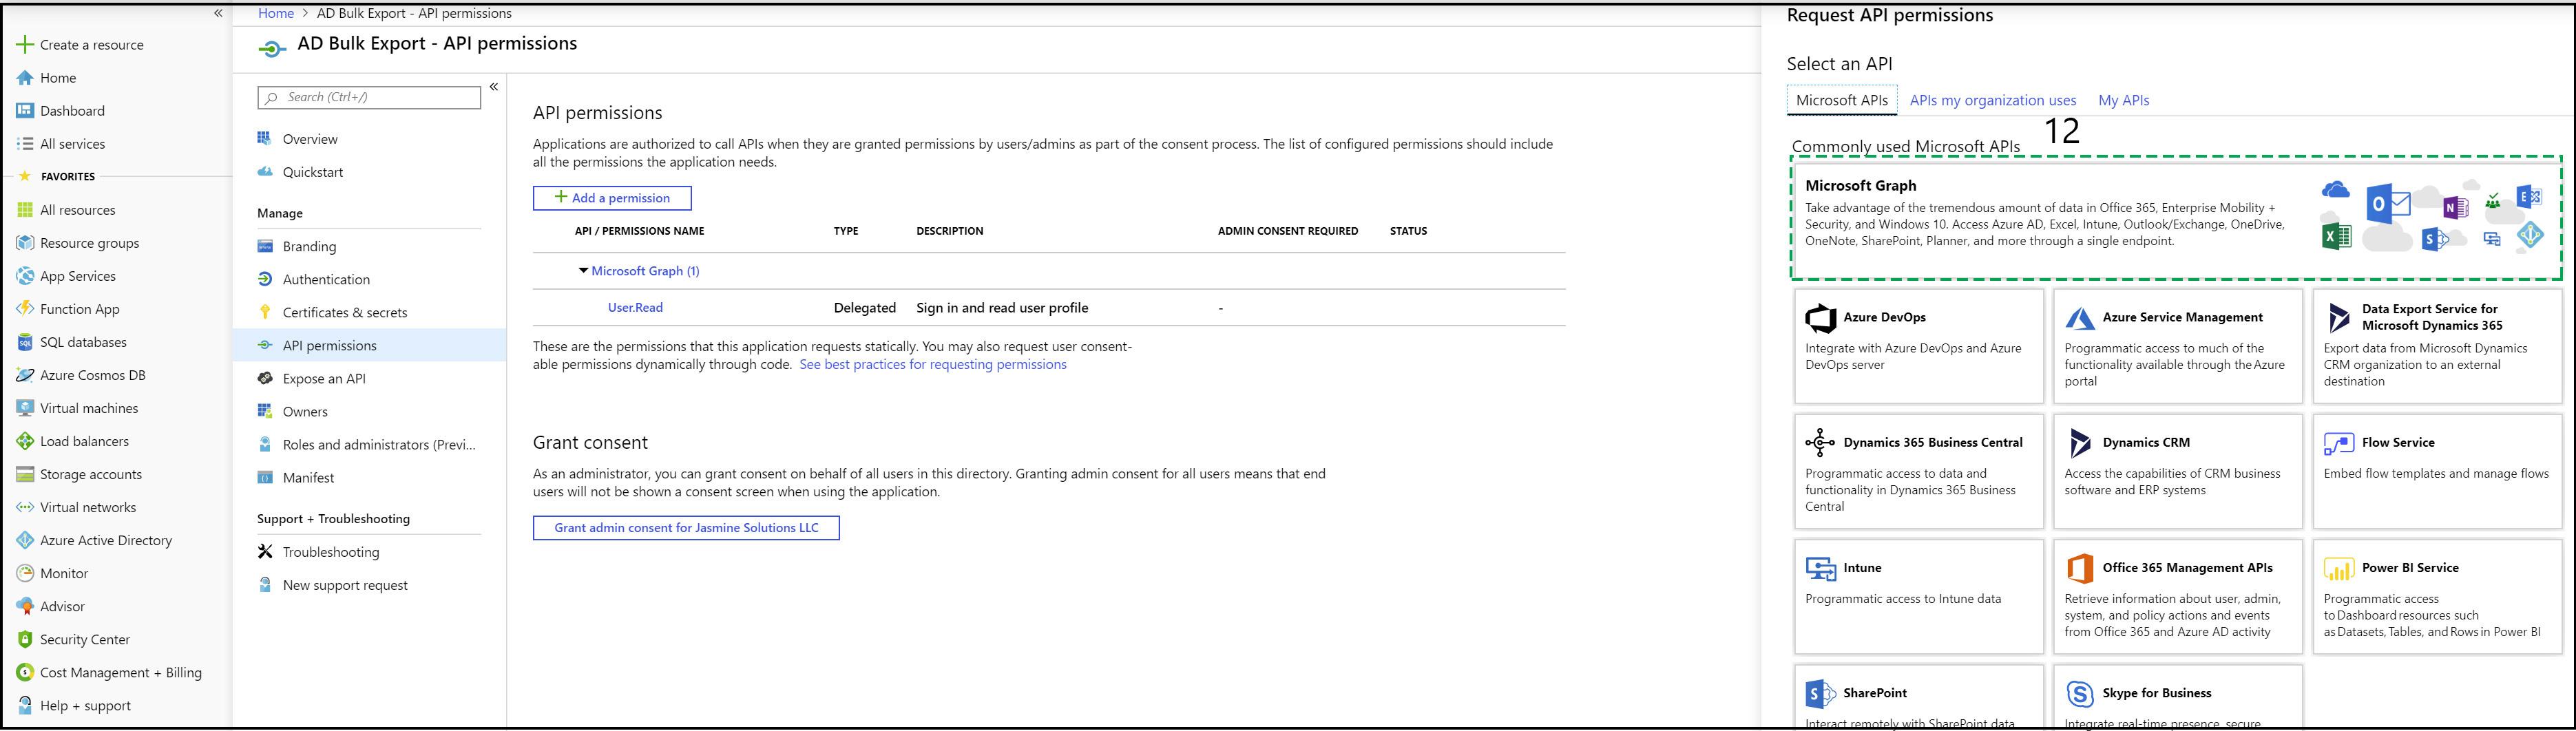
We click on the API permissions option (11) to set the permissions for our app.
Applications are authorized to call APIs when they are granted permissions by users/admins as part of the consent process. The list of configured permissions should include all the permissions the application needs.
So we click on Add a permission, than we select the Microsoft Graph option. (12)
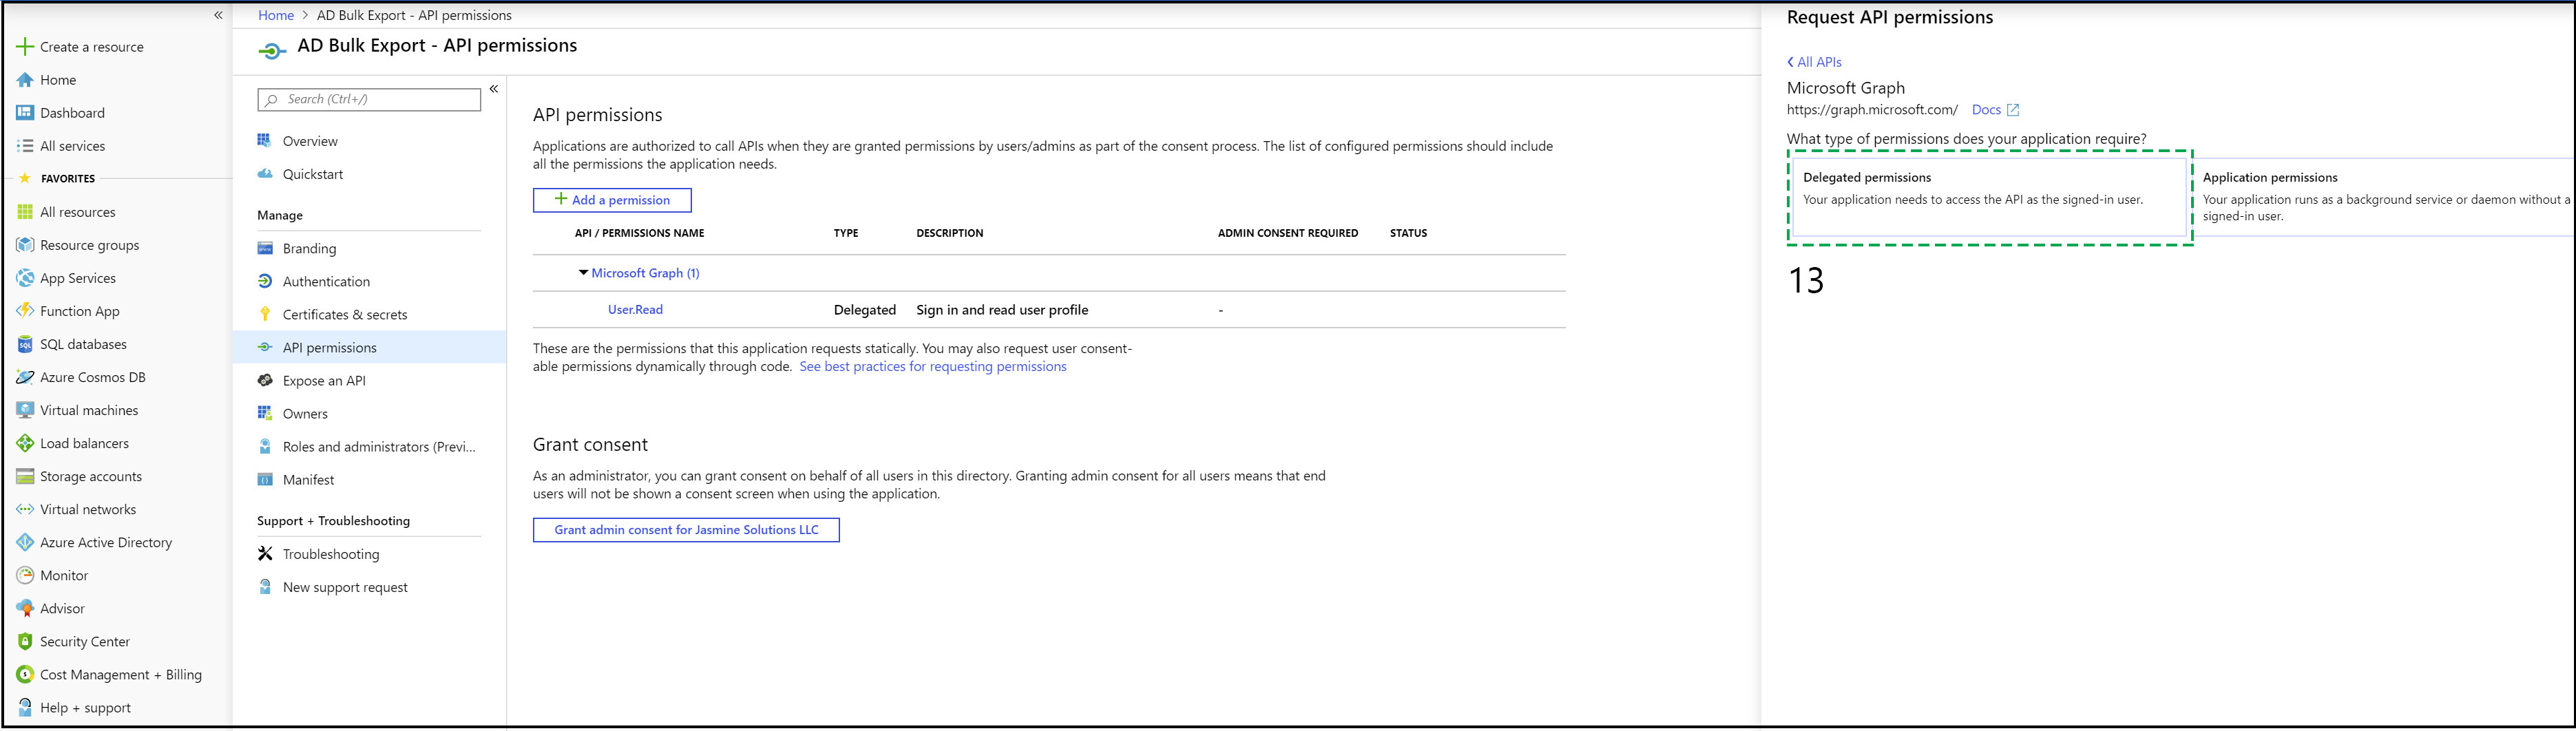
These are the permissions we need to set. Click on the Directory parent category and select:
“Directory.Read.All”,
“Directory.ReadWrite.All”,
“Directory.AccessAsUser.All” (14.a.)
Than, scroll down and click the Group parent category and check the “Group.Read.All” option. (14.b.)
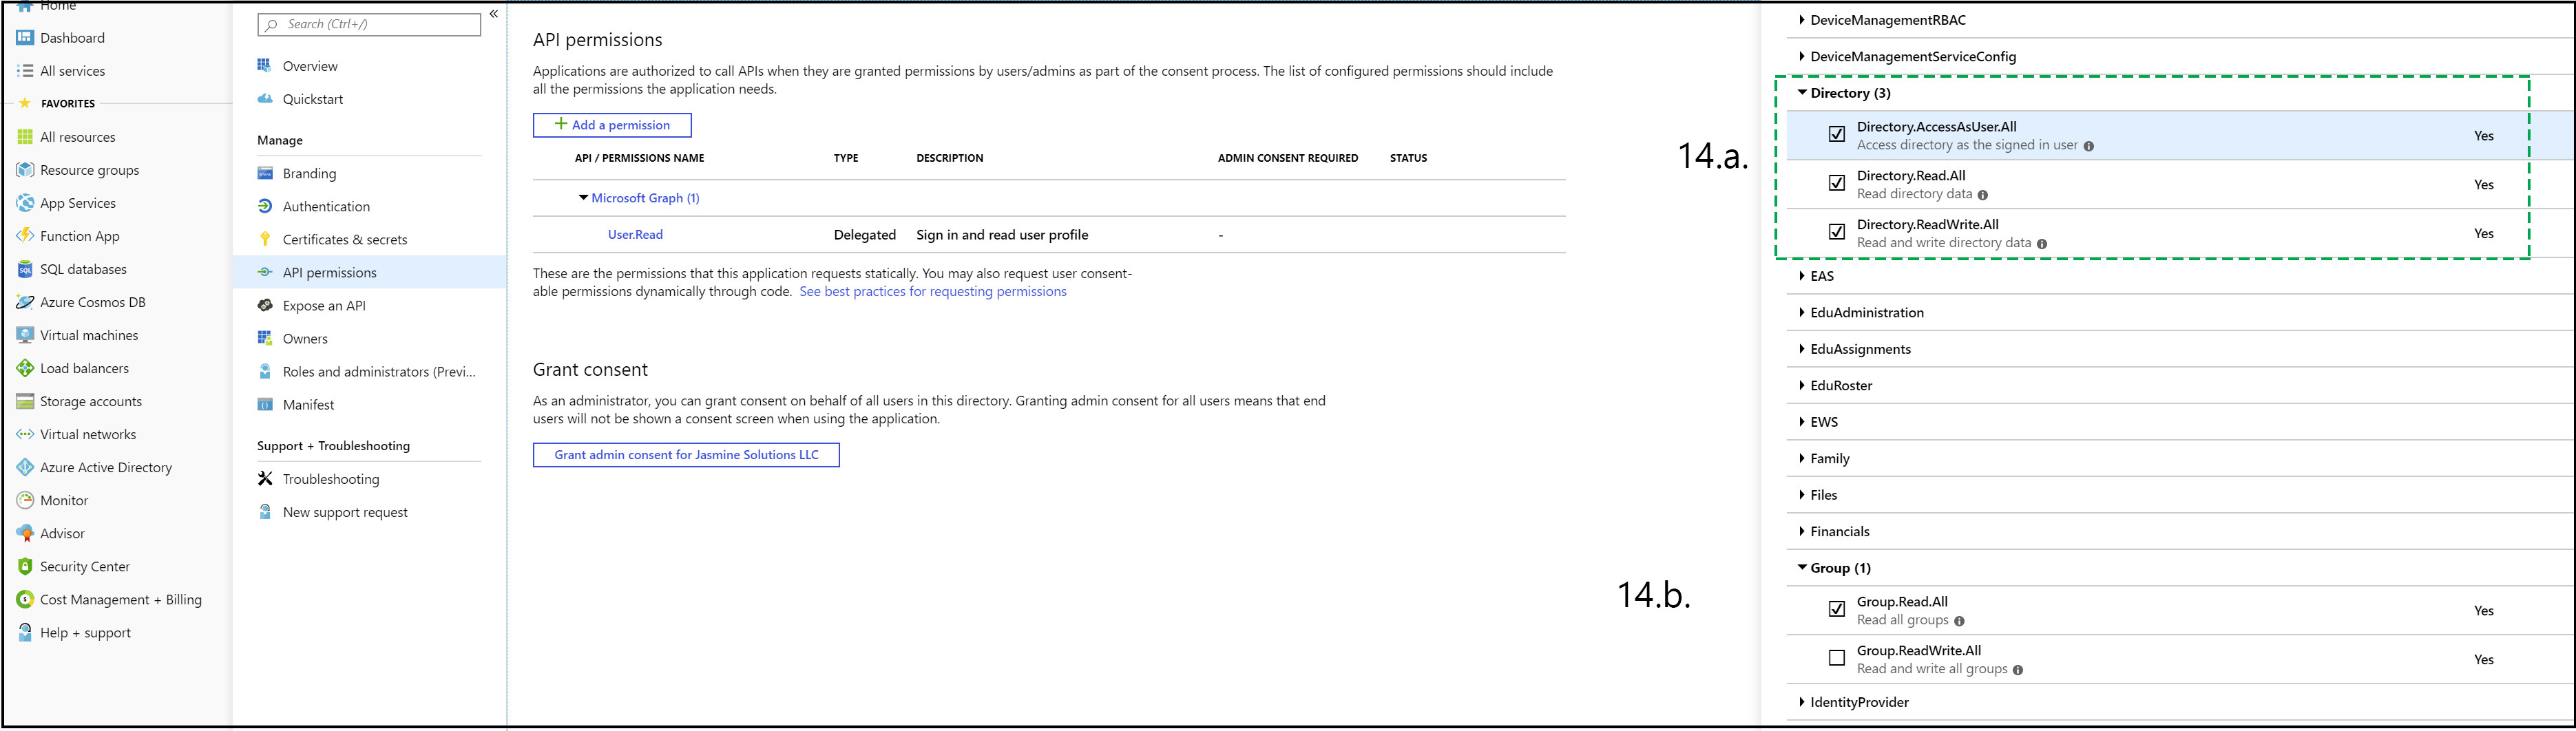
The parent categories are alphabetically sorted. Under the Users parent category you’ll need to check these two options:
“User.Read”,
“User.Read.All”. (14.c.)
Finally, click Add Permissions to save the selected options. (15)
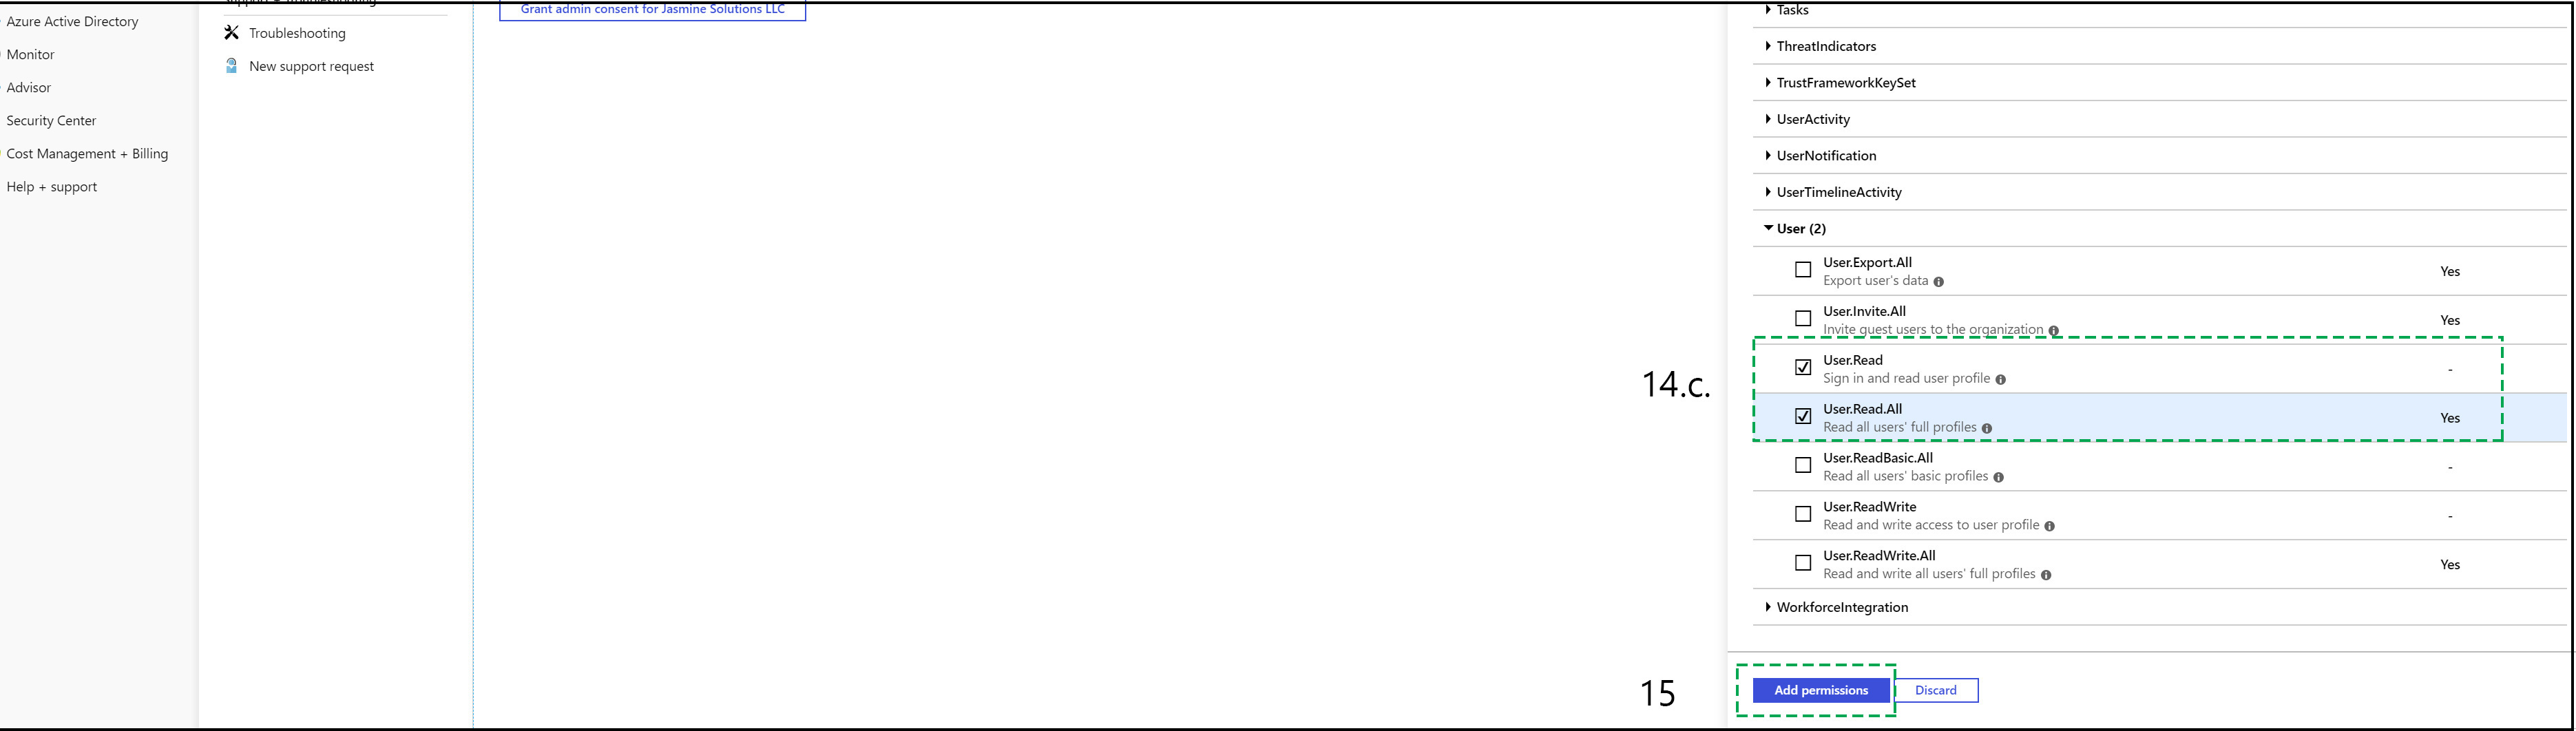
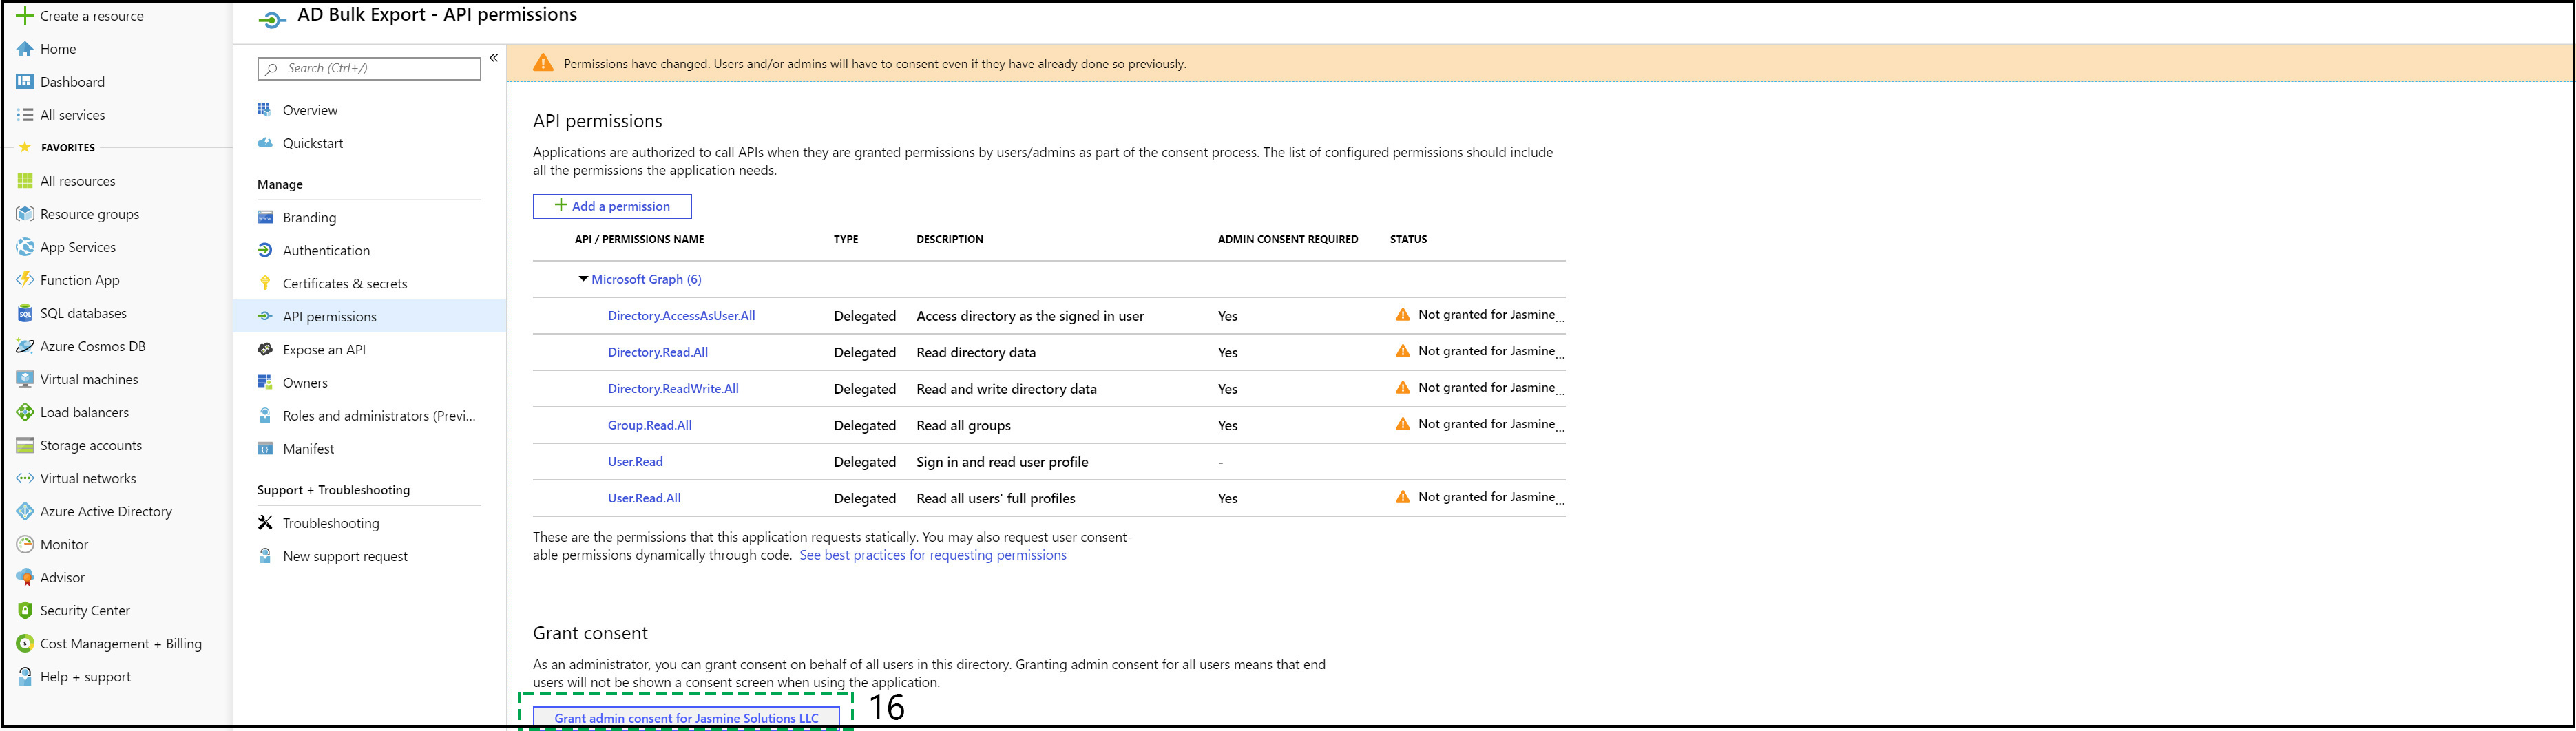
A notification box will be visible with this notice: “Permissions have changed. Users and/or admins will have to consent even if they have already done so previously.”
As an administrator, you can grant consent on behalf of all users in this directory. Granting admin consent for all users means that end users will not be shown a consent screen when using the application.
Click on the bottom Grant Consent button. (16)
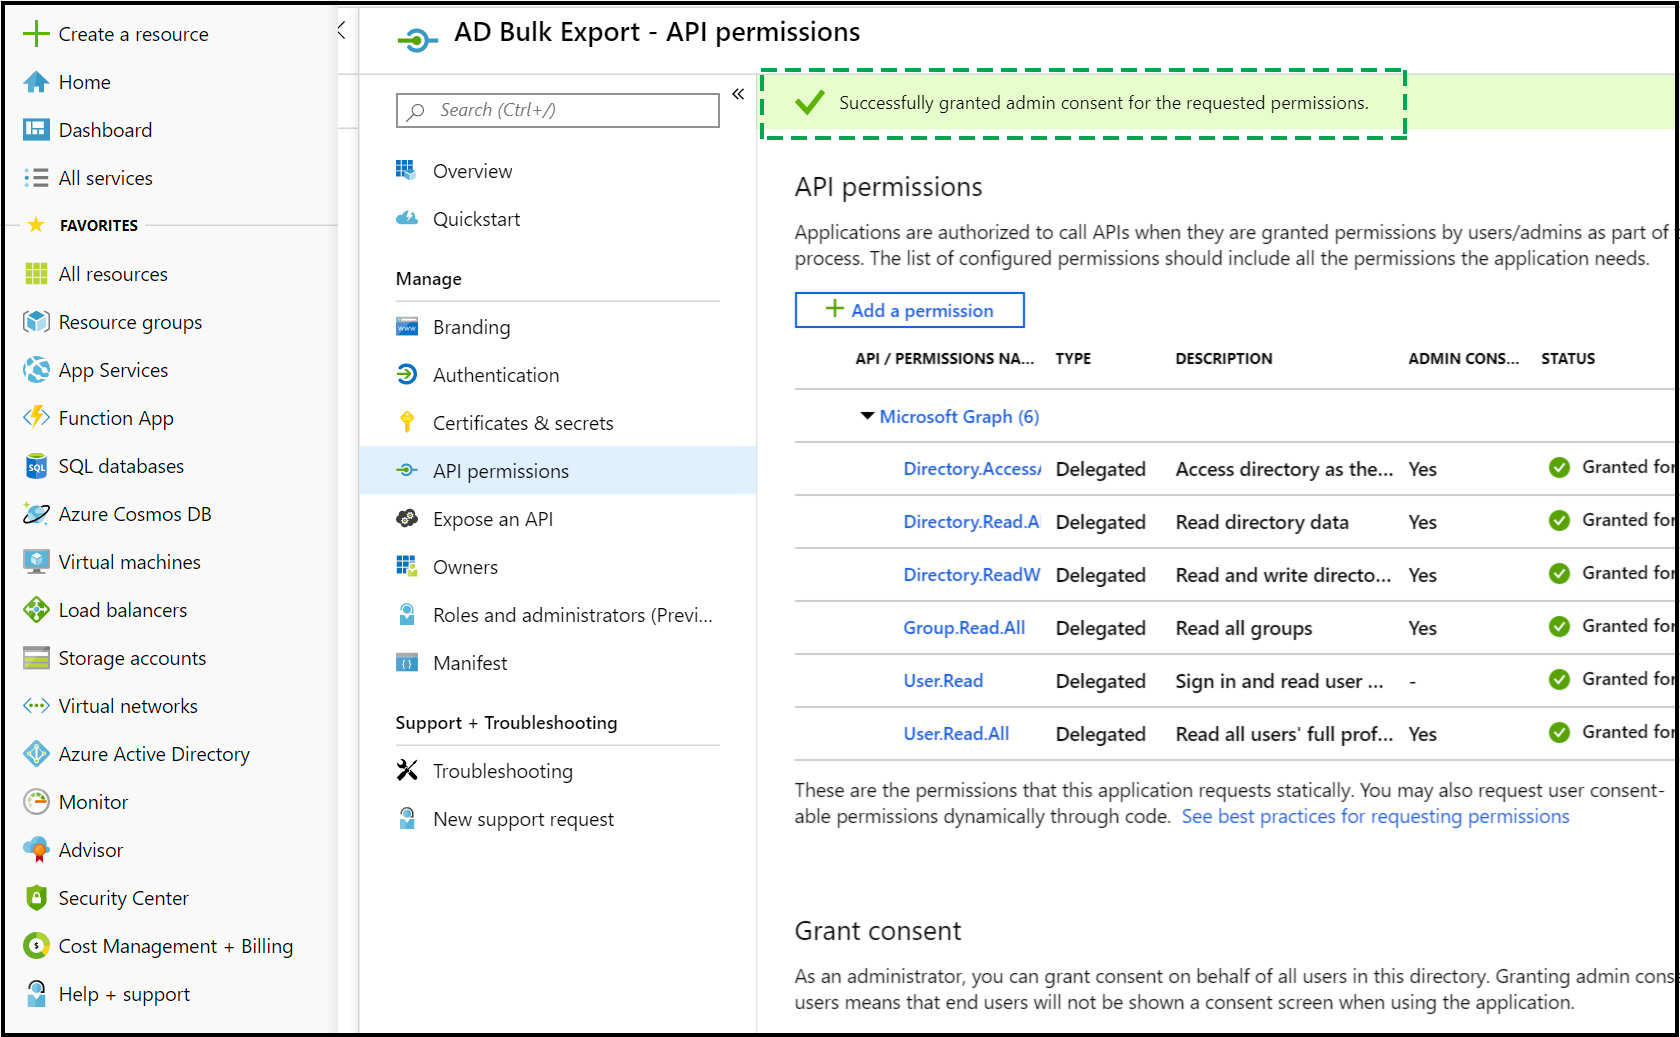
You will be prompted with the confirmation that you want to grant consent for the requested permissions for all accounts in <your tenant name>. This will update any existing admin consent records this application already has to match what is listed below. Click Yes.
A green boxed notification containing “Successfully granted admin consent for the requested permissions.” will appear:
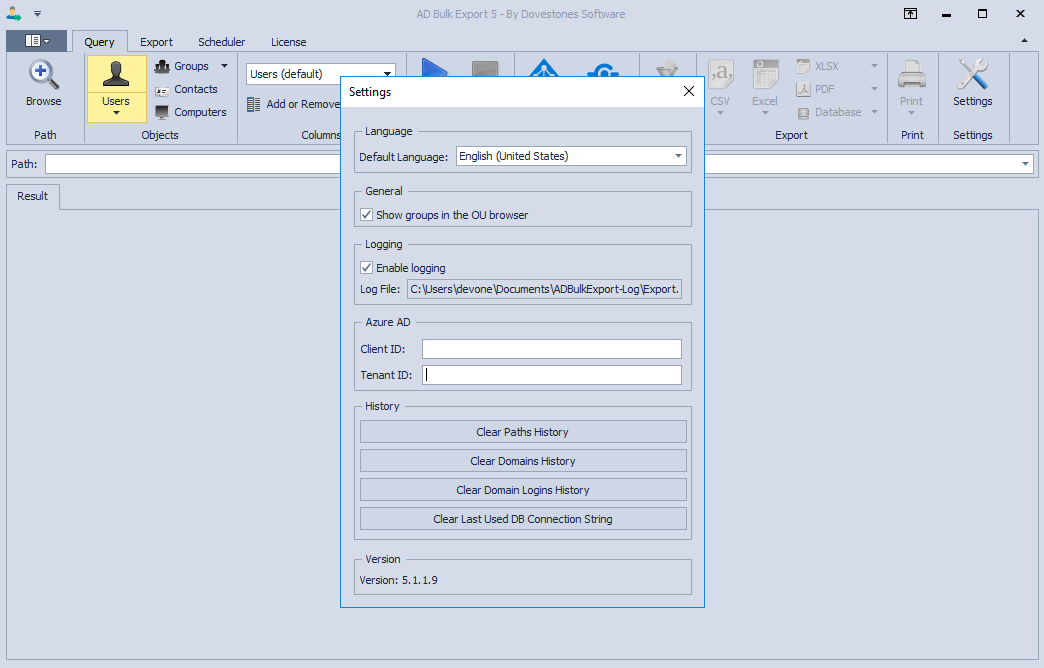
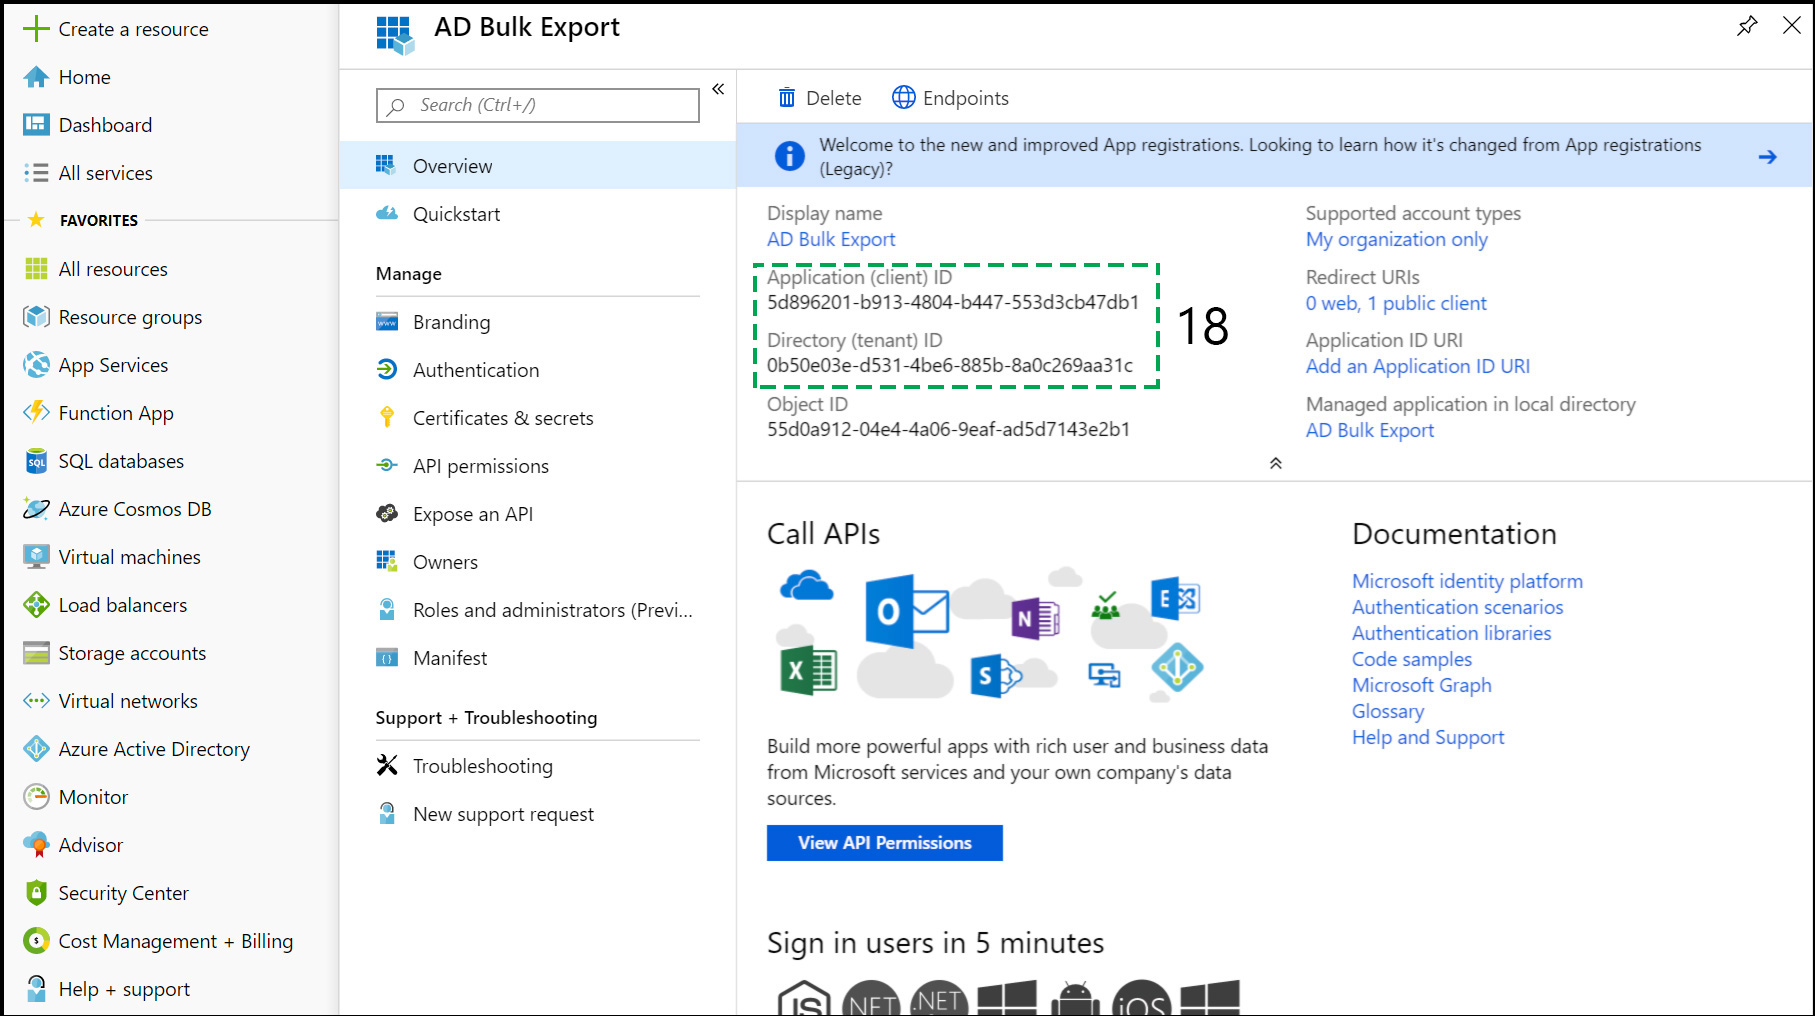
As the final step of the process you will have to return to the Overview section and copy Application ID (client) and Directory ID (tenant).
After copying those two values, you will have to paste them into the AD Bulk Export program under the Settings menu and you’re all set and… congrats, you’re done.