Using AD Photos
Importing photos into Active Directory or Office 365 is straightforward, to start with we’ll import a single photo, you can do this by following the steps below.
Add a single photo to an Active Directory user
1. Ensure you have entered a domain and selected a domain controller, if you are importing to Office 365 specify a username and password for the connection.
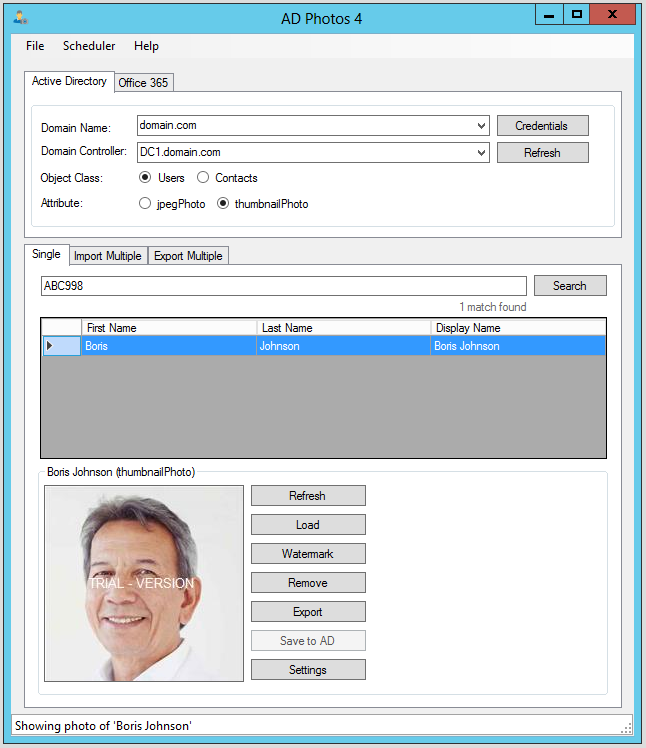
2. Enter a username in the ‘Username’ text box and click ‘Lookup’. If this user already has a photo stored in Active Directory this will be displayed.
3. Click ‘Load Photo’ and select the file you want to use, the file should be 10kb or less in size and its dimensions should be 96 x 96 pixels if you are saving the photo to thumbnailPhoto attribute, jpegPhoto attribute does accept larger images up to 200 x 200 pixels.
4. Click ‘Save Photo’ to save the photo to AD.
You can view the photo by entering the username in the ‘Username’ text box and clicking ‘Lookup.
Importing multiple photos into Active Directory or Office 365
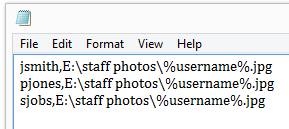
To import multiple photos is just as easy, the program reads a CSV file that contains the username or employeeID value (defined in settings) followed by the path to where the image is located.
Example CSV file:
Wildcards %username% or %employeeID% can be used in the path to the photo.
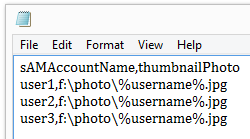
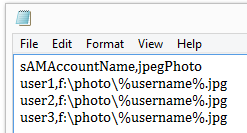
The import file doesn’t require headers however if you need to use headers, below are two examples, the attribute name determines where the photo will be saved.
Note: The path to the photo can also be a UNC path:
If you want the program to locate users in Active Directory using their employeeID value rather than their username, change the ID Column value in settings as shown below. The first column of your import file will assumed to be the users employeeID value.

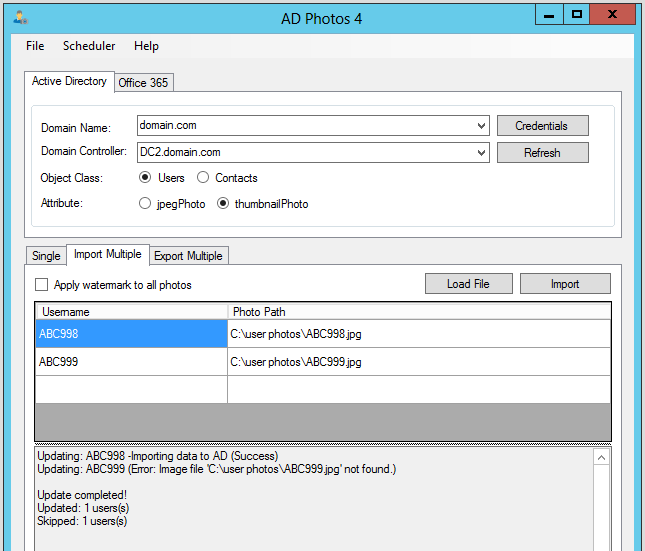
To import photos for multiple users follow the steps below:
- Click on the tab ‘Multiple Users’.
- Click ‘Load CSV’ and select the CSV file you want to use. The username (or employeeID) and path to the photo will be shown in the data grid.
- Click ‘Import’, any errors will be shown in the log.
That’s it.
You can verify a user has the correct photo by doing a search.
Removing photos from users
To remove a photo simply enter a username, click ‘Lookup’, the photo will be displayed, click ‘Remove Photo’ and then click ‘Save’.
Using Outlook and thumbnailPhoto
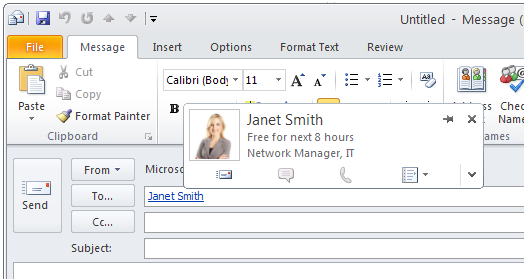
Many Microsoft programs including Outlook 2010 and above now display user photos, these are normally pulled from the thumbnailPhoto attribute in Active Directory. If using Office 365 the photo is likely to be synced to the users mailbox.
With older domains running in an older function level it may be necessary to run the command below if you are not seeing your photos displayed. This involved making a small change to the Active Directory schema, if you haven’t run the MMC schem snap-in before you will need to register it by typing the following command ‘Regsvr32 schmmgmt.dll’.
Once registered type MMC in the Run box and then when the console loads click the ‘File’ menu and select ‘Add/Remove Snap-in’, select the Active Directory Schema snap-in from the list, click ‘Add’ and then ‘OK’.
When loaded click on ‘Attribute’ and browse to the thumbnailPhoto attribute, right click it and choose ‘Properties’, the window below will load, check ‘Replicate this attribute to the Global Catalog’ and click OK.
That’s it, you will now be able to view the photos in Outlook 2010 and later.
Using Sharepoint and thumbnailPhoto
Sharepoint can read the users photo from the thumbnailPhoto attribute.
Displaying photos in the AD Phonebook
The AD Phonebook program can display the photo from the thumbnailPhoto attribute or the jpegPhoto attribute. If you would like your users to upload their own photo then this can be done with AD Self Update.
The image below shows the AD Phonebook reading the thumbnailPhoto attribute.
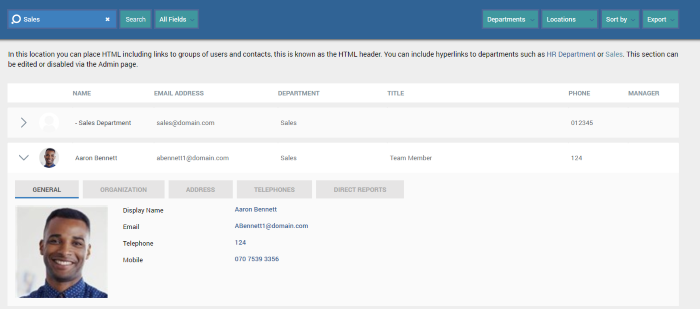
When importing photos for use with AD Phonebook ensure thumbnailPhoto is checked (the default).
AD Phonebook will automatically display the photo if one is found. You can turn this feature off, please see the AD Phonebook manual.

